How to Send Automated Emails in Outlook: A Step-by-Step Guide

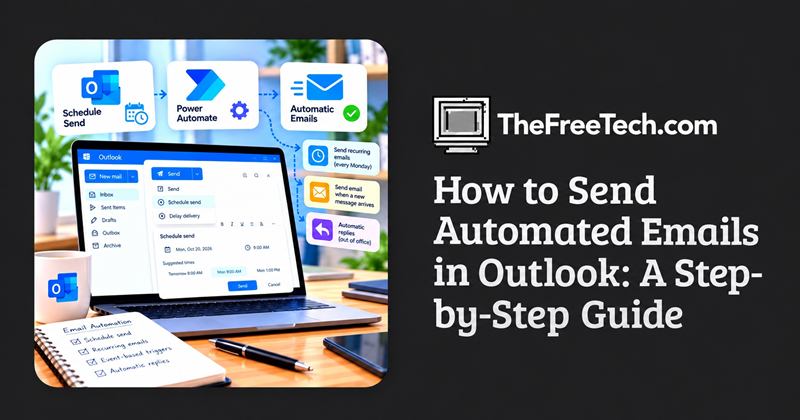
To send automated emails in Outlook, use Schedule Send for a one-time message or Microsoft Power Automate to send recurring emails and messages triggered by specific events. The right method depends on whether you want to send an email once, repeat it on a schedule, or respond automatically to incoming messages.
Which Outlook Email Automation Method Should You Use
| What you want to do | Best method |
|---|---|
| Send an email at a specific future time | Outlook Schedule Send |
| Send a reminder every Monday | Power Automate scheduled cloud flow |
| Send an email when a new message arrives | Power Automate automated cloud flow |
| Reply automatically while away | Outlook automatic replies |
| Delay all outgoing emails briefly | Outlook rules, where supported |
1. How to Schedule an Email in Outlook
If you have already written an email and want it delivered later, use Outlook's built-in scheduling feature.
In new Outlook or Outlook on the web
Open Outlook and select New mail.
Enter the recipient, subject, and message.
Select the dropdown arrow next to Send.
Choose Schedule send.
Select a suggested time or enter a custom date and time.
Select Send to confirm.
Your scheduled message remains in Drafts until its scheduled delivery time. You can reopen it to cancel or change the scheduled delivery.
In classic Outlook for Windows
Compose a new email.
Open the Options tab or the message options dialog.
Under Delivery options, select Do not deliver before.
Choose the date and time.
Close the dialog and select Send.
The message stays in your Outbox until the scheduled time. Classic Outlook needs to remain online and connected for this delivery method to work.
Important: Scheduling a single email is not the same as setting up a recurring automation. If you need the same email to go out every week or month, use Power Automate instead.
Official instructions: Microsoft Support — Delay or schedule sending email messages in Outlook.
2. How to Send Recurring Emails Automatically Using Power Automate
Microsoft Power Automate lets you create a workflow that sends emails at regular intervals without manually composing each message.
For example, you could send a weekly project reminder every Monday at 9:00 AM.
Step 1: Create a scheduled flow
Sign in to Microsoft Power Automate.
Select Create.
Choose Scheduled cloud flow.
Enter a flow name, such as “Weekly Project Reminder.”
Set the start date, repeat interval, and frequency.
Create the flow.
Step 2: Add an email action
Add a new step to the flow.
Search for Send an email (V2).
Select the action under Microsoft 365 Outlook.
Enter the recipient's email address.
Add the subject and message body.
Example:
Subject: Weekly Project Status Reminder
Body: Please update your project status before today's team meeting.
Replace the example address with your intended recipient.
Step 3: Save and test the automation
Review the recurrence schedule and email content.
Select Save.
Run a test if the available testing options permit it.
Check the recipient's inbox and the flow's run history.
Confirm that the flow is enabled.
Once configured, the cloud flow runs according to its schedule, subject to its connections, permissions, and service limits.
Official guide: Microsoft Learn — Run a cloud flow on a schedule.
3. How to Automate Emails When an Event Occurs
You can also configure Outlook email automation to respond to a particular event rather than a fixed time.
For example, you might want to send a notification when a new email arrives from a specific sender.
A typical workflow is:
Open Power Automate and select Create.
Choose Automated cloud flow.
Select a trigger such as When a new email arrives (V3).
Configure any relevant conditions, such as the sender or subject.
Add Send an email (V2) as an action.
Configure the recipient, subject, and message body.
Save the flow and test it with a suitable incoming email.
You can use similar workflows for notifications, email-based approvals, and follow-up messages. The available triggers and actions depend on the connected services and your account permissions.
See Microsoft's guide: Trigger a cloud flow based on email properties.
4. How to Troubleshoot Outlook Email Automation
Schedule Send is missing
Check which Outlook version you are using and whether your account type supports the feature. New Outlook's scheduled-send feature is not available for IMAP or POP accounts.
A scheduled email did not send
For classic Outlook, check that the application is online and connected. For a Power Automate flow, review the run history for failed actions, expired connections, or permission errors.
The same email was sent more than once
Review the flow's recurrence settings and triggers. Check whether multiple flows are active or whether an incoming-email trigger is firing more than once for the same event.
A Power Automate flow is not running
Confirm that the flow is enabled, the schedule is correct, and the Outlook connection is valid. Check your organization's Power Automate licensing and usage limits if the problem persists.
FAQ
Can Outlook automatically send emails every day?
Yes. You can create a scheduled cloud flow in Power Automate and configure it to send an email daily, weekly, or at another supported interval.
Do I need to keep Outlook open for automated emails?
Not for a properly configured Power Automate cloud flow. Classic Outlook's delayed-delivery feature, however, requires Outlook to be online and connected when the message is due to send.
Can Outlook send an email automatically when I receive another email?
Yes. Power Automate can use an incoming-email trigger and send another message when the specified conditions are met.
Can I schedule an email without sending it immediately?
Yes. Use Schedule Send to select a future delivery time. You can review the scheduled message before it is sent.